Friday, November 25, 2016

Our Thanksgiving Tradition

There are many things to be grateful for, and many ways to express gratitude. And while we should all be continuously thankful for the little miracles of everyday life, it is truly wonderful that Thanksgiving comes once a year, to remind us to really stop, think, and be consciously appreciative.

Every family has its own Thanksgiving rituals. Some are decades old, others relatively new. Ours falls into the later category, and reflects our family’s evolution and growth. We started our tradition about a decade ago, when my kids were still little but could already draw.

Our tradition calls for the making of a “Thank You” poster a few weeks before Thanksgiving. In the weeks leading to the holiday, anyone who comes to our house has to write what they are grateful for on a note, and paste it onto the poster. This is our way to nudge everyone to think more deeply about the things we normally take for granted.

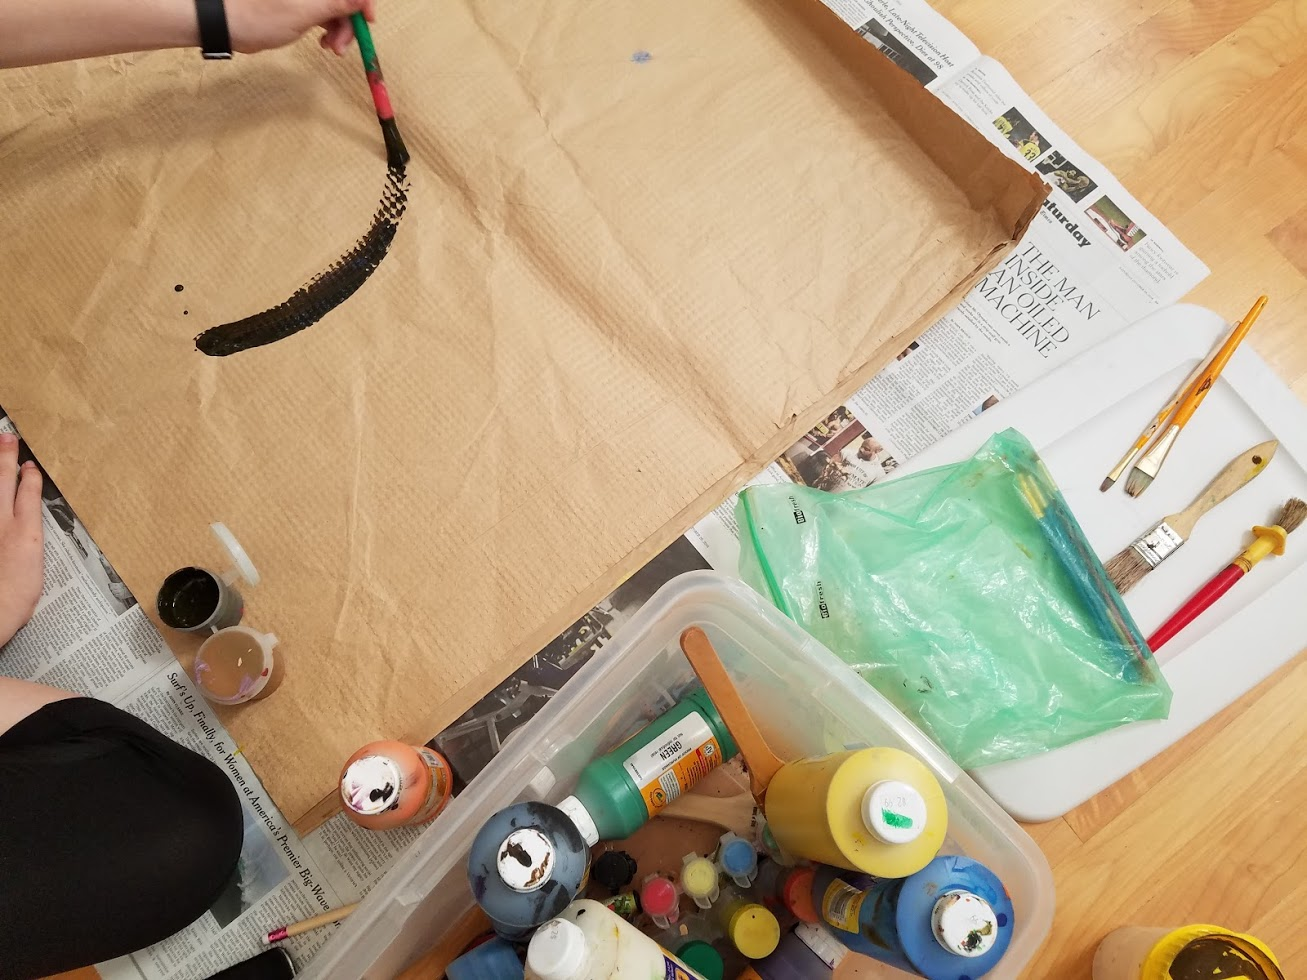
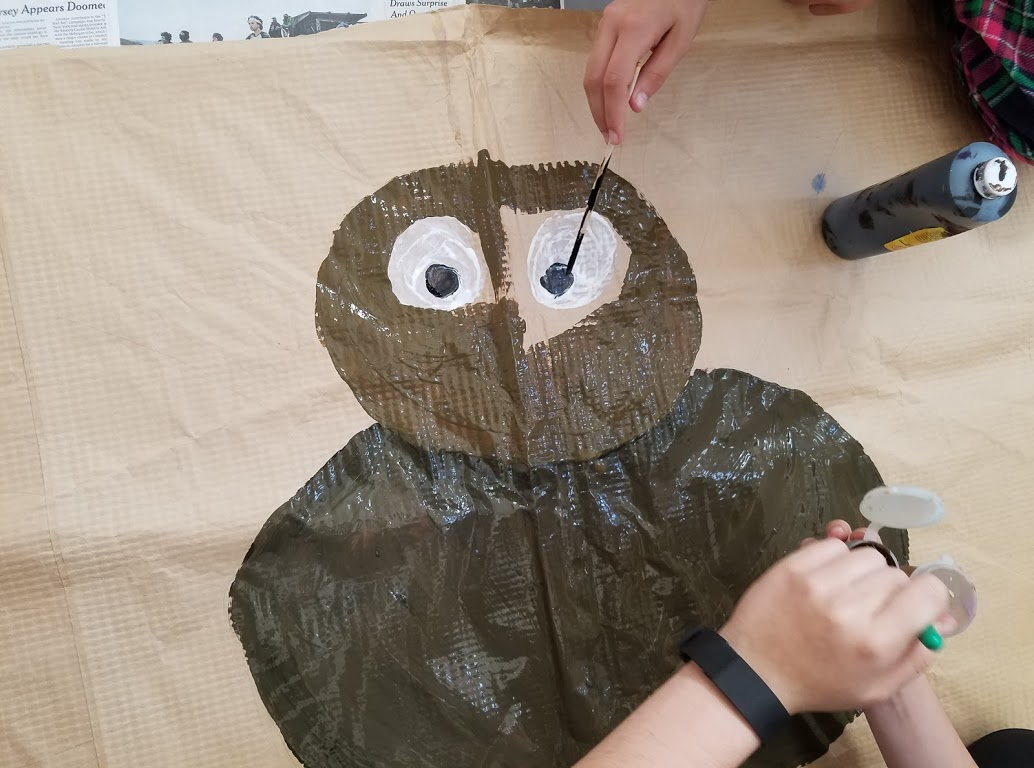
From the very beginning, the kids have been responsible for coming up with a poster theme. I wish I could say that the process has always been cooperative, friendly and peaceful. Sadly, this would be somewhat of an exaggeration. But always, after some arguing, fighting and the occasional shout, they have been able to come to an agreement. Over the years we've had Thank You trees, scenes involving native Americans and pioneers, pumpkins and corn, and last year--The Speedwell. This year the kids chose to paint a Thanksgiving turkey.


Once the kids decide on a topic, they cooperate on planning the composition and on the actual painting. Each person gets to do what they are good at and capable of. Some draw, others paint, or cut, or paste. Every year they choose to use different materials. Some years they use crayons, on other years acrylic, or something else. The resulting work of art reflects their collaborative efforts.


Once the poster is finished we hang it on the wall in our dining room, right above the Thanksgiving table.

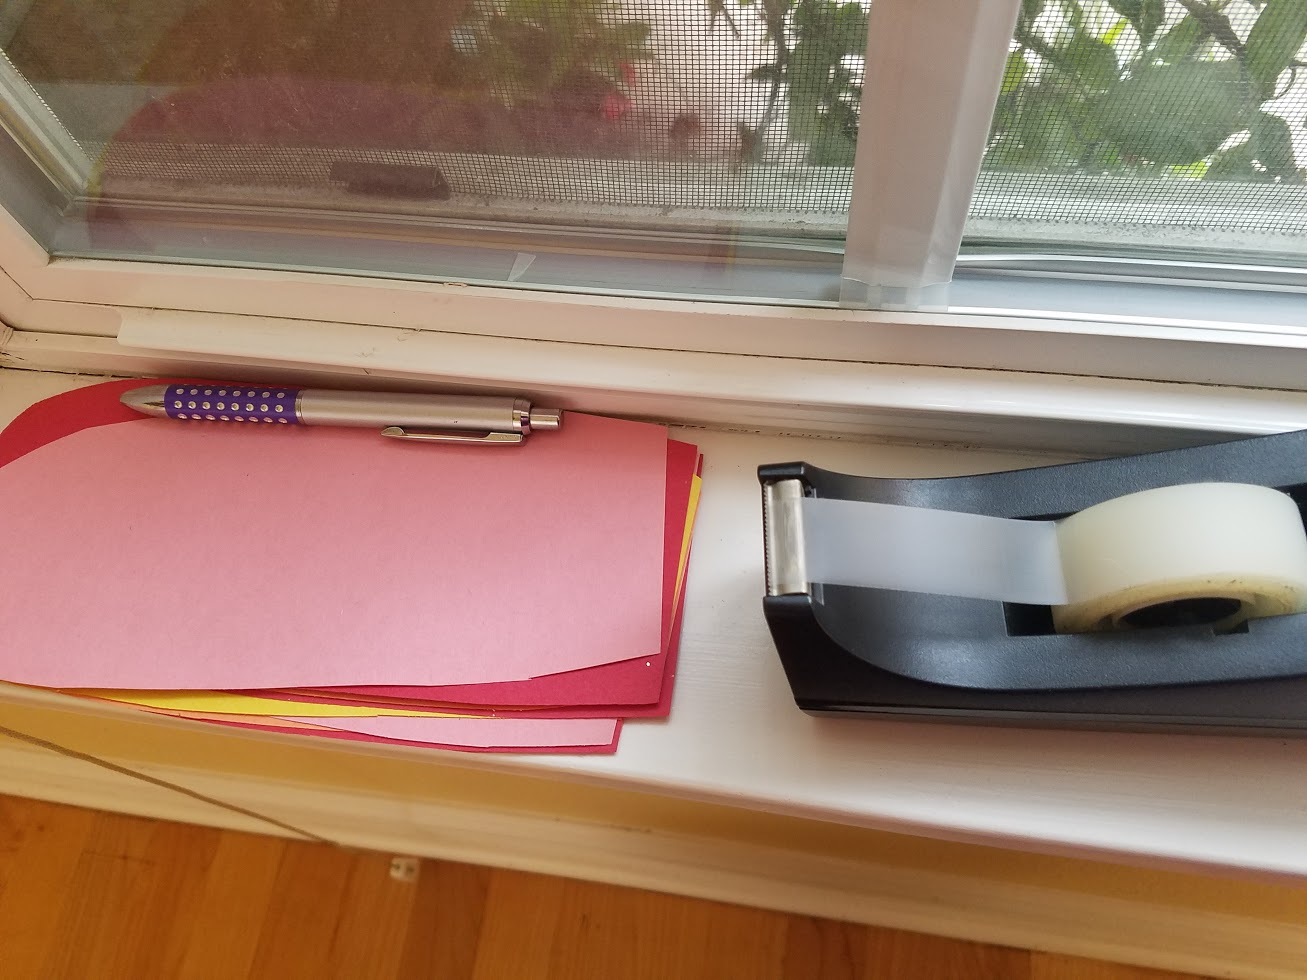
The kids then cut little pieces of paper in shapes matching the theme of the painting (leaves, corn kernels, sails and such), and put them in a small pile near the poster, together with a pen and tape.


Then people get to write what they are thankful for, and paste it onto the painting.


We leave the painting hanging even after the holiday is over, and make all our guest write on it. Appreciating life, after all, should be ongoing. We later keep the posters, which become time-capsules of sorts, and which reflect our lives at any given year.  

Friday, November 18, 2016

On Friday Bake a Challah!

I used to try and bake a challah every Friday. Well, almost every Friday. I love waking up on Saturday mornings to a fresh slice of homemade bread and honey. Since I started sewing, however, my enthusiasm for baking seems to have decreased. Not because I no longer like it, but because I always seem to have other, more urgent things to do on Friday mornings. The silver lining is that when I do bake challahs these days, they are extremely popular. When I made them regularly, I was often the only one trying to eat the dried-up leftovers for Thursday breakfast. Now everyone fights over my loaves, leaving not a crumb by Saturday afternoon…

Today I decided to make time for challah baking, and it occurred to me that other people might like to try some, too.

My regular challah recipe is actually based on a Swiss Bernese Zupfe. Bread, it seems, unites many cultures, and maybe we should learn something from it...

Ingredients:

1 kg white flour
2 packs dried yeast (30 gr each)
1 tbs salt
1-2 tbs sugar
1 stick butter
2 cups milk
2 eggs

Preparation:

Mix all dry ingredients in a large bowl. Add milk ,eggs and butter, and knead until you get a soft, non-sticky dough. Add milk if too dry, or flour if too wet, until you reach the right consistency.

Let rise for two hours. Punch down, knead again, and shape into whatever shape you want. I often braid my challahs, but sometimes I make them round. Every now and then I let the kids shape them whichever way they want. We recently had an elephant, a snail and several Pokemons.

Let rise again for another two hours.


You can now bake your bread, but if you would like a nicer finish this is the time to mix an egg with a bit of water in a small bowl, and brush it over your loaves. You can then spread sesame seeds or poppy seeds for an even nicer, more finished look.

Bake at 350 degrees for about 40 minutes, until your loaves are nice and brown.

Let cool.


Tip: it's really nice to grab a slice while the challah is still warm. It’s especially tasty with melted butter on top!


Enjoy!

Friday, November 11, 2016

Experimenting with Fabric Art: "Give a Hand" Art Quilt

In the last year I’ve sewn practical items for everyday life, and greatly enjoyed seeing them put to use as well as making them. However, for a long time I’ve been eager to find time for fabric art per se. I had an image in my mind: my hand, repeated in a grid, in some of my favorite colors. This week I finally found the time to actually make it:


There is something very primal about a hand print. It was one of the first images our ancestors created on cave walls, when humans first started making art. It is one of the first things young children print on paper, when they are given paint for the first time. In many cultures a print of the hand, or a “Humse,” protects against evil. Hands are crucial for everything we do. My work is all HANDmade, and that is what makes it unique. We all have hands, and yet each person’s hands are very much their own. Hands make us the individuals that we are, yet, in their similarity, unite us into the wider web of humanity.

I decided to make an art quilt, yet break all the rules of quilting. Instead of the fine cotton fabrics usually used for quilting, I chose to incorporate the upholstery fabrics I fell in love with over the last few months.

For a long time I collected suitable pieces in my favorite colors and textures, until I had enough. Early this week I ironed double-sided interfacing to the back of the pieces, and meticulously outlined my left hand on nine different fabrics. I chose to use my actual hand and not a mold. This way each drawing turned out slightly different, yet they are all of the same thing. I cut them each out, getting a mirror-image that looks like, but is not, my right hand. I ironed them to their background, and then chose embroidery thread to go with each:


Next, I appliqued each and every one by hand. There is something very soothing about the repetitive motions of hand stitching. It is a wonderful stress-reliever for me, and this week turned out to be the perfect time to do this kind of work:


When all the pieces were appliqued, I played around with their arrangement:


I then settled on a pattern I liked, and machine-sewed all the pieces together, using a zigzag stitch:


When the entire top was finished, I “sandwiched” the piece together: top, batting and back, and set about to quilt them. Here I encountered an unexpected difficulty: the bulk of two layers of upholstery fabrics, combined with the batting and occasional seam, could not fit under my machine foot! I hadn't planned on hand-quilting this piece, but this is exactly what I had to do.

I hand quilted a few quilts before, but this one felt a lot different. Since each piece of fabric had a different texture, stitching through each felt very distinct. The more velvety segments were easier to sew through. Others were really resistant, and required the use of much force. It didn't take long before I had to frantically search for my various thimbles!


At one point my needle broke, something that never happened to me before! I had broken many a machine needles, but never a “real” one:


I chose to quilt this work with a color-changing thread that I thought might tie all the different hues together. Originally, I planned for an elaborate quilting pattern. After the first few stitches, however, I realized that neither the color of the thread nor the pattern mattered much: unlike with quilting cottons, the upholstery fabrics seemed to have “swallowed” the thread. It mostly disappeared within the textures, drowning into them. So I changed my plans, and quilted for practical reasons only: to attach all three layers together.   


The stitching itself also had to be adjusted. Due to the heaviness of the “sandwich” I had to go for much larger, far-between stitches than I would have attempted on a traditional quilt.

The result, however, turned out to be very close to what I originally had in mind.


The heavy fabrics give the work a significant body, and the different, delicious textures give it lusciousness that traditional quilts lack.


I like to think of this work as a gesture of peace: a welcoming wave of “hello” many times over. We desperately need such gestures at this time.

Friday, November 4, 2016

Why I don’t Make Costumes for My Kids

Halloween came and went, and once again I felt the pang of guilt that washes over me every October. Another year had passed, you see, without me sewing unique costumes for my kids. This year I felt guiltier than ever, for over the past twelve months I’ve spent more time than ever hunched over my sewing machine. I sewed many items, but costumes weren’t amongst them.

When I was a kid, my parents set a very high bar. For years they made my siblings’ and my costumes, all ingenious and unique. One memorable year in preschool, for example, they turned me into a dwarf sitting on a mushroom. My upper body was the dwarf. Somehow my parents attached a doll’s arms to my shoulders, inserted my arms-turned-dwarf’s-legs into small doll’s pants, and shoved my hands into little shoes. My lower body became the mushroom, with a stiff skirt serving as the mushroom’s top, and my own legs, clad in white tights, acting as the mushroom’s stem. I am quite sure the world has never seen such a feat. Another year they dressed my sister as a doll in a box. The pictures of these and other costumes were something we kids kept going back to.

So when I had kids of my own it only seemed natural to me that I should make their costumes, too. On their first Halloween we even attempted a family costume: my husband, myself and our toddler daughter were black cats, while my second daughter, still a infant, was dressed as a cute white mouse. I assembled the clothes and hand-sewed all our ears and tails. Shopping for the fabrics and accessories, measuring, figuring it all out and stitching took hours. We wore these costumes one evening. For most of that time they were hidden behind coats, for it was a rainy Halloween, as many Halloweens tend to be. Then they were tossed aside.

A week later, on a visit to Target, my toddler spotted made-in-China rabbit ears that cost less than a dollar. She forced me to buy a pair. She and her sister ended up playing with them for years, until they fell apart.  I learned my lesson right there and then: The kids couldn’t distinguish between handmade costumes that took hours to make, and the cheap, store-bought stuff. They couldn’t care less how much planning or time went into preparing their garb. They were just as happy, if not a little more so, with the flimsy, sparkly Chinese stuff. To make things worse, it turned out that the main attraction of the holiday wasn’t the costumes at all. What my kids really cared about (and later remembered) were the piles of candy, and the excitement of collecting them. I realized then that my life was plenty busy as it was. That was the end of my costume-making attempts.

Since then my kids have been responsible for putting together their own outfits. They have been deciding what they wanted to be, and have been in charge of making sure they have everything they needed. Sometimes they used things we already had around the house, or costumes from years past. Sometimes they asked me to buy something new. At other times they made the costumes themselves, often together with friends. Every now and then it was a combination of the above. And yes, when necessary I did help make a prop or two, or helped a kid attach one thing to the other. This year, for example, I got away with cutting a simple, Pikachu tail out of yellow felt.

Over the years I noticed how much the kids actually liked being in charge of their own dress-up. Planning what to wear got them excited. Making it themselves brought out their best creative energies. Working together with friends on a combined outfit encouraged cooperation, strengthened friendships and sharpened negotiation skills. I realized that leaving this responsibility to the kids was actually good for them.

But while my brain knows that it's perfectly OK--and even advisable--for me not to interfere with Halloween preparations, my heart still feels guilty. And I still greatly admire super-moms like my sister, who, despite being extremely busy, still find the time (and energy!) to come up with family-themed costumes, and then make them all from scratch. I just realize this doesn’t quite work for me.

As for my kids, despite being Halloween veterans, they are still mostly interested in the loot: mountains and mountains of colorful, cavity-causing sugars, which they enjoy sorting, arranging, comparing and exchanging.