Friday, December 16, 2016

Falling Leaves Don't Only Inspire

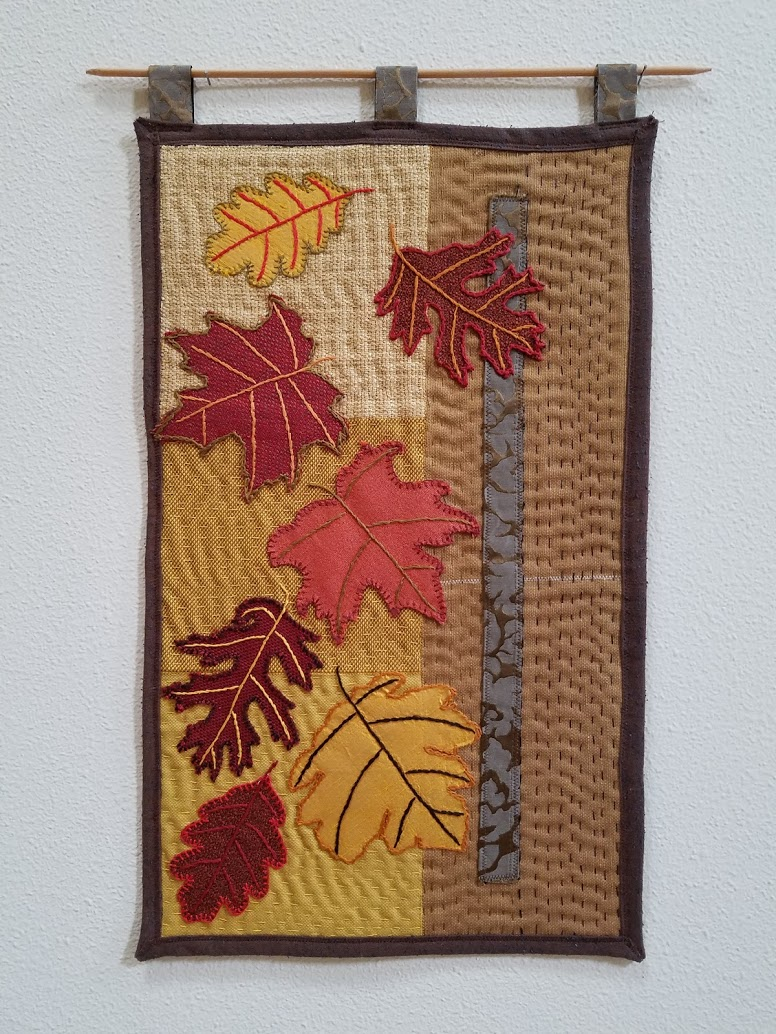
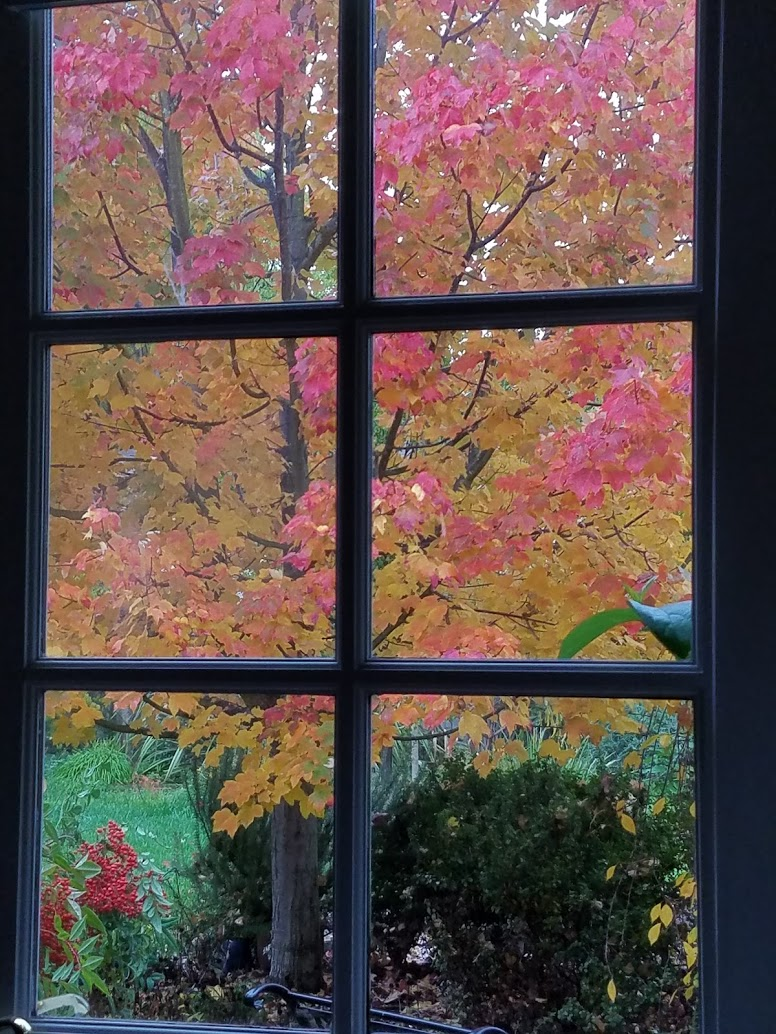
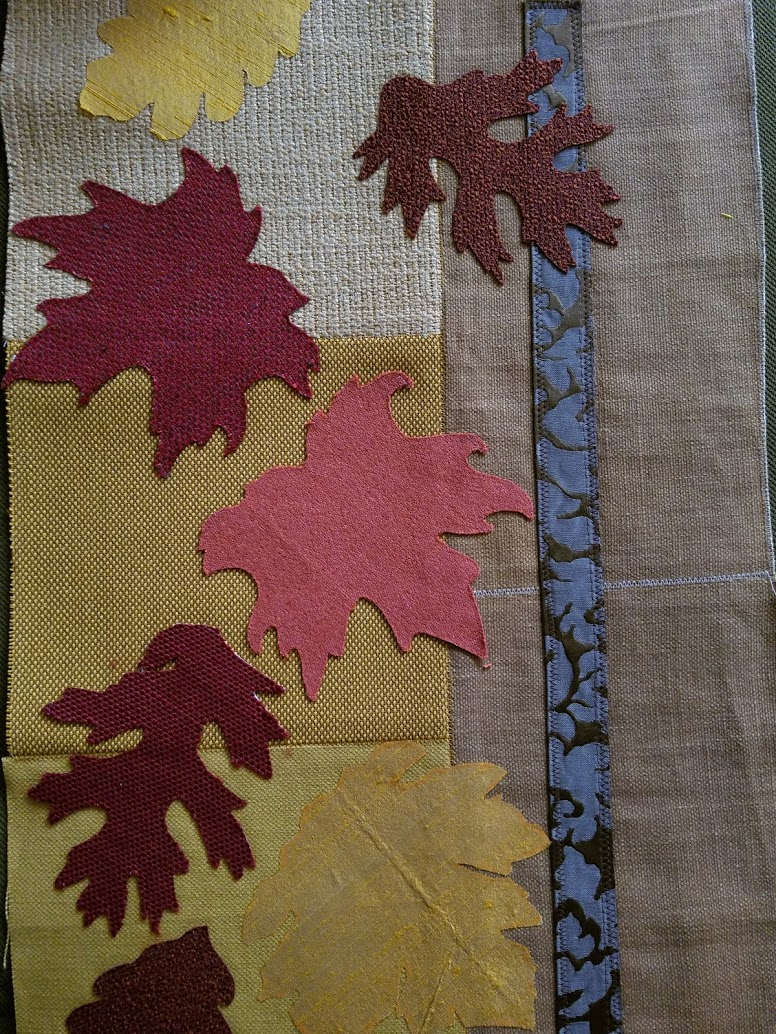
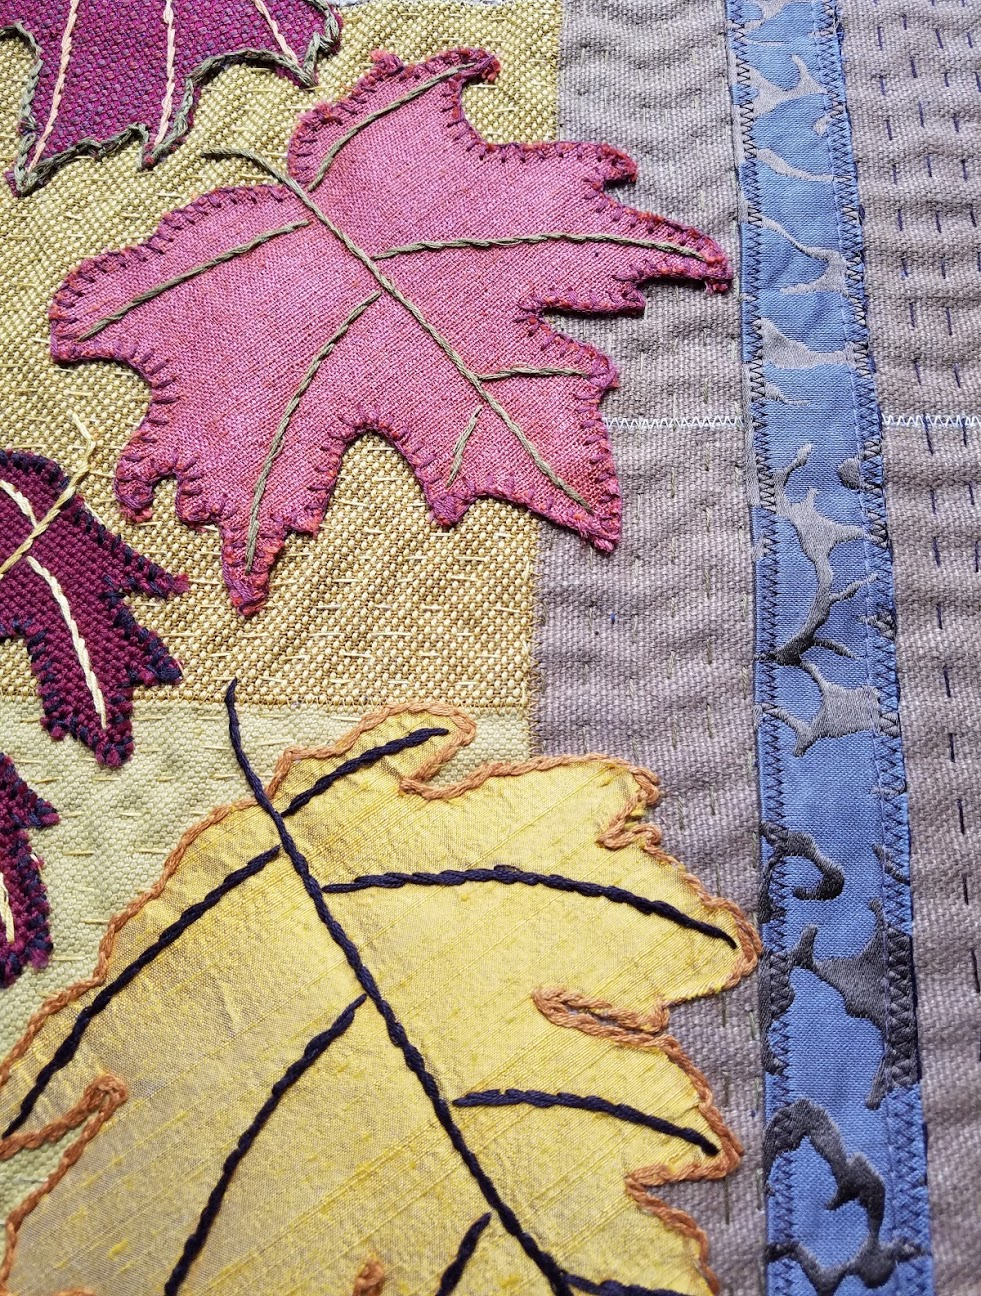
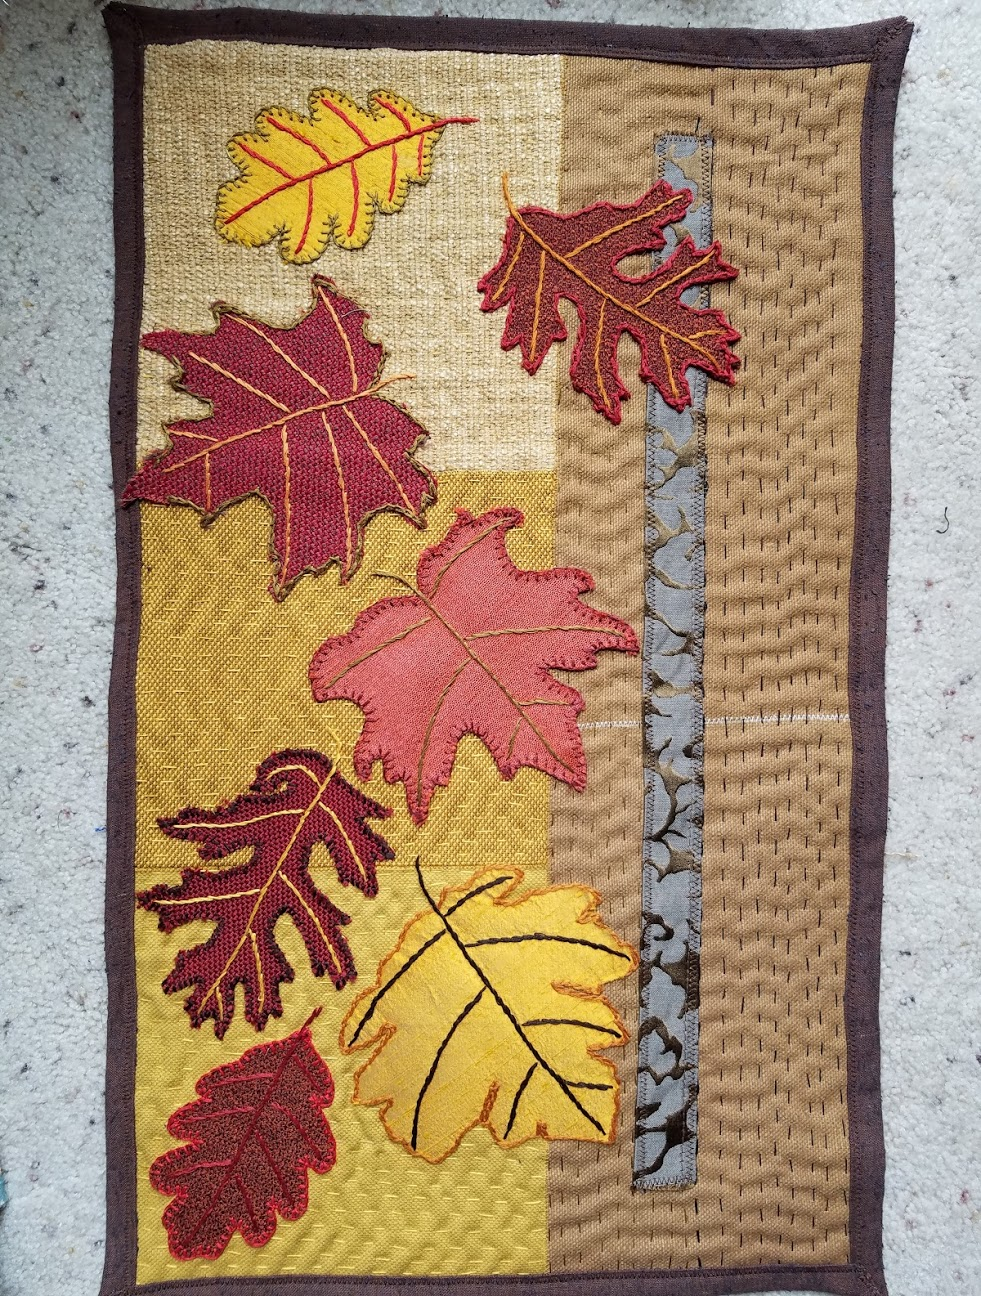
It took only a day or two of rain and some strong winds to strip the glory off the maple tree that inspired my Falling Leaves quilt. And so, in the last few days, instead of shining with magnificent fall colors, my garden was filled with sad-looking naked branches and huge piles of fallen, muddy leaves:


Granted, I must admit that some were still quite beautiful, even on the ground:


To me, however, even in their deplorable state, falling leaves are a pure treasure, and not only for their former beauty. I already confessed to being a little obsessed with recycling. I religiously recycle paper, plastic and metal, and of course--FABRIC. I also already mentioned my love of gardening. So it is only natural that, whenever possible, I try to recycle in the yard, as well.

One of the first things I did after I got my own garden for the first time, was to take a composting workshop. This might seem somewhat unnecessary to all you seasoned gardeners, but at the time I really didn’t know much about decomposition, and a workshop seemed appropriate. It lasted two hours, and could be summed into one sentence: fill a bin with 50% green cuttings and 50% dry material, mix, wet, and wait.

Since then I’ve been trying to return everything that comes from the garden back into the garden. In the city’s garden-waste bins I deposit only diseased plants, parts that are too fibrous, or especially-thick branches. Everything else goes into my compost bin:


In fact, there are many weeks in which I don’t even bother to take the city garden bins to the curb since they are completely empty.

Composting everything is a lot of work, and requires some advance planning. For things to compost at a reasonable time (for me, that means up to a year), every plant needs to be chopped into smaller pieces. In spring and summer this translates into hours and hours of standing above the compost bin and chopping green cuttings. In the fall, the main season for collecting the “brown” component that composting requires, it means hours of collecting leaves, and then meticulously storing them away in paper bags, to be added to the bin slowly over the remaining months of the year.

It’s actually really good for the soil to just let falling leaves decompose where they fall. There are parts of my garden where I do just that--let nature take care of itself. I collect only leaves that fall on paths, the lawn or on other plants. Depending on the location, I either rake or vacuum them. Vacuumed leaves get automatically chopped by the vacuum into smaller bits, which are easier to store and which decompose faster.

Last weekend was my last crafts fair for the year. The weeks leading to the fair were hectic, leaving me with little time for anything else. Once the fair was over I took a break from sewing, and this week tried to catch up on everything else. The garden was on the top of my list.

Since I still haven’t used up all the leaves I stored last year, I decided this year to  use everything I collect as ground cover. A thick layer of ground cover (preferably six inches thick) helps protect roots from frost, and in summer helps keep the moisture in. So this week I raked and vacuumed wherever needed, and then deposited piles of chopped leaves all over the yard:


In the coming days I will spread these piles more evenly, covering as much ground as possible with this highly-beneficial dry material.

The hours (and days!) it takes to collect leaves and other organic matter, chop , spread, or compost everything aren’t always pleasant, but all that work pays off. My modest compost bin reliably produces rich, high-quality and entirely organic (!!) compost. My compost is swarming with life: earthworms, Armadillidiidae (also known as Roly Polies), earwigs and all kinds of other creatures call it a home. Once I even found baby salamanders in the mix! Every year I spread this compost around fruit trees and on flower beds. It enriches the native California clay soil, feeds the earthworms--who in turn dig and loosen the soil, bringing air to roots--and in general makes my plants happy. The reward comes in spring and summer, with amazing flowers and tasty fruits . And it all begins with these leaves, that shine with golden light in the fall and then turn into black gold by summer!

Friday, December 9, 2016

Falling Leaves Art Quilt

Over the last few weeks I’ve spent every free moment in my sewing room, laboring over my Renaissance Totes. I really wanted to get them finished in time for the German Holiday Market (tomorrow!), and did my utmost to make that happen. However, I couldn’t help but start another project on the side. I never thought I’ll manage to complete that, as well, but miraculously I did!


This all started when, around Thanksgiving, my workroom started to feel like a golden cathedral. The culprit was our maple tree, which remained persistently green until a day or two before Turkey Day, whence upon it metamorphosed seemingly overnight to its most glamorous state.

Being right outside my studio’s window, the tree overwhelmed the room, filling its windows and door with breath-taking reds and yellows, and shining golden light onto everything. My quiet sewing moments thus turned into a truly spiritual, almost meditative experience. In the presence of this awe-inspiring natural beauty I felt like the most lucky person on earth.


Despite being engrossed with my new tote series, I felt compelled to do something with those leaves. And so, encouraged by my “Give a Hand” quilt, I started working on a smaller, “Falling Leaves” wall hanging. Since it required many relatively-short steps, I was able to work on it on the days the kids were on vacation, and in the short intervals in-between cooking and house chores. I also pulled a few late nights this past week, with the crafts fair looming near...

I started by selecting an array of fall-colored fabrics, onto which backs I ironed applique double-sided interfacing. I then drew leaves on the paper side, including some maple leaves but also interesting-looking leaves from other kinds of trees:


Then I cut them all out:


I deliberately chose different-textured fabrics, as that is the most exciting aspect, for me, of working with upholstery fabrics versus the more traditional quilting cottons. By incorporating this golden silk, for example, I think I managed to convey some of the radiant light that illuminates from real fall leaves:


I arranged the composition, and ironed the leaves onto the background, fusing the pieces together:


Now the piece was ready for the labor-intensive hand-stitching stage. I started with appliqueing around the leaves. When I worked on my Hand Quilt I used only a blanket stitch. This time I decided to use several kinds of stitches, to make the work a bit more interesting. I still used blanket stitch on some of the leaves:


But I also incorporated other stitches, such as this chain stitch:


You will notice that I learned a lesson from my previous experience, and used thimbles right from the start on this one! Upholstery fabrics are really hard to stitch through... Despite my precautions, however, I still got a blister on my thumb…

When all the leaves were appliqued to the background, I went on to embroider their veins:


Then, as in any quilt, I sandwiched the three layers together: top, batting and back.


And went on to quilt them all together, using big, noticeable stitches, Japanese boro style:


I played with the colors of the thread as well as with the direction of the stitches to give the piece added interest. Here is a detail:

And the whole piece quilted:


The big stitches gave the background a crinkly look that I really like. It somehow reminds me of the bark of a tree, or of a forest floor.

Friday, December 2, 2016

“Renaissance Totes”

Over the past few months I’ve accumulated a few pieces of gorgeous, thick fabrics, with tribal/Southwestern designs. I just loved the look and feel of these fabrics, which radiate richness and a feeling of luxury.


However, I wasn’t quite sure how to use them in a way that will do them full justice. I incorporated a couple as flaps for messenger bags, such as the one I gave my mom:


Or the one I listed on Etsy:


But although I liked the results, I didn’t feel that messenger bags truly showed the beauty of these fabrics to their full extent.

A few weeks ago, as I was surrounding myself with piles of fabrics on my studio’s floor (a favorite pastime!), I suddenly notices one of these pieces lying next to a beautiful velvety one. Normally I might select the later as the underside of a flap, where it would be practically invisible, but seeing the two pieces lie one next to the other gave me a new idea.

I frantically started matching fabrics:


I soon realized that framing my lavish, color-and-design-intense pieces with other pieces of matching, solid colors enhanced the beauty of the center pieces, and really brought out the different colors in their design. Putting them next to solid fabrics with luxurious-feeling textures elevated the effect further.

I liked what I saw so much, that I went on to search for all the other pieces of this kind, and found matching fabrics for them as well.  I enjoyed this a great deal, for drowning myself in fabrics and matching them together is one of the best parts of creating!


For the last four weeks or so I’ve been working on this new series, which I call “Renaissance Totes” for their sumptuous feel. This new collection includes eight totes, most of which are still works in progress. The work has been slow, partly because these totes are composed of many small pieces that need to be sewn together; partly because I am sewing some of the leather handles on by hand, which is arduous and time consuming (I have to use three thimbles simultaneously, and just broke my second needle ever!); and partly because there were many school vacations over the last few weeks, and my kids have been home more than they’ve been at school (or so it feels...).

Yesterday I finally managed to finish the first tote in this series, and am really happy with how it turned out! Here is a picture of the front:


And of the back:


I am hoping to be able to finish all eight in time for my next crafts fair, which is coming up on December 10th. I think they will go really well with winter boots and coats!

Friday, November 25, 2016

Our Thanksgiving Tradition

There are many things to be grateful for, and many ways to express gratitude. And while we should all be continuously thankful for the little miracles of everyday life, it is truly wonderful that Thanksgiving comes once a year, to remind us to really stop, think, and be consciously appreciative.

Every family has its own Thanksgiving rituals. Some are decades old, others relatively new. Ours falls into the later category, and reflects our family’s evolution and growth. We started our tradition about a decade ago, when my kids were still little but could already draw.

Our tradition calls for the making of a “Thank You” poster a few weeks before Thanksgiving. In the weeks leading to the holiday, anyone who comes to our house has to write what they are grateful for on a note, and paste it onto the poster. This is our way to nudge everyone to think more deeply about the things we normally take for granted.

From the very beginning, the kids have been responsible for coming up with a poster theme. I wish I could say that the process has always been cooperative, friendly and peaceful. Sadly, this would be somewhat of an exaggeration. But always, after some arguing, fighting and the occasional shout, they have been able to come to an agreement. Over the years we've had Thank You trees, scenes involving native Americans and pioneers, pumpkins and corn, and last year--The Speedwell. This year the kids chose to paint a Thanksgiving turkey.


Once the kids decide on a topic, they cooperate on planning the composition and on the actual painting. Each person gets to do what they are good at and capable of. Some draw, others paint, or cut, or paste. Every year they choose to use different materials. Some years they use crayons, on other years acrylic, or something else. The resulting work of art reflects their collaborative efforts.


Once the poster is finished we hang it on the wall in our dining room, right above the Thanksgiving table.

The kids then cut little pieces of paper in shapes matching the theme of the painting (leaves, corn kernels, sails and such), and put them in a small pile near the poster, together with a pen and tape.


Then people get to write what they are thankful for, and paste it onto the painting.


We leave the painting hanging even after the holiday is over, and make all our guest write on it. Appreciating life, after all, should be ongoing. We later keep the posters, which become time-capsules of sorts, and which reflect our lives at any given year.  

Friday, November 18, 2016

On Friday Bake a Challah!

I used to try and bake a challah every Friday. Well, almost every Friday. I love waking up on Saturday mornings to a fresh slice of homemade bread and honey. Since I started sewing, however, my enthusiasm for baking seems to have decreased. Not because I no longer like it, but because I always seem to have other, more urgent things to do on Friday mornings. The silver lining is that when I do bake challahs these days, they are extremely popular. When I made them regularly, I was often the only one trying to eat the dried-up leftovers for Thursday breakfast. Now everyone fights over my loaves, leaving not a crumb by Saturday afternoon…

Today I decided to make time for challah baking, and it occurred to me that other people might like to try some, too.

My regular challah recipe is actually based on a Swiss Bernese Zupfe. Bread, it seems, unites many cultures, and maybe we should learn something from it...

Ingredients:

1 kg white flour
2 packs dried yeast (30 gr each)
1 tbs salt
1-2 tbs sugar
1 stick butter
2 cups milk
2 eggs

Preparation:

Mix all dry ingredients in a large bowl. Add milk ,eggs and butter, and knead until you get a soft, non-sticky dough. Add milk if too dry, or flour if too wet, until you reach the right consistency.

Let rise for two hours. Punch down, knead again, and shape into whatever shape you want. I often braid my challahs, but sometimes I make them round. Every now and then I let the kids shape them whichever way they want. We recently had an elephant, a snail and several Pokemons.

Let rise again for another two hours.


You can now bake your bread, but if you would like a nicer finish this is the time to mix an egg with a bit of water in a small bowl, and brush it over your loaves. You can then spread sesame seeds or poppy seeds for an even nicer, more finished look.

Bake at 350 degrees for about 40 minutes, until your loaves are nice and brown.

Let cool.


Tip: it's really nice to grab a slice while the challah is still warm. It’s especially tasty with melted butter on top!


Enjoy!

Friday, November 11, 2016

Experimenting with Fabric Art: "Give a Hand" Art Quilt

In the last year I’ve sewn practical items for everyday life, and greatly enjoyed seeing them put to use as well as making them. However, for a long time I’ve been eager to find time for fabric art per se. I had an image in my mind: my hand, repeated in a grid, in some of my favorite colors. This week I finally found the time to actually make it:


There is something very primal about a hand print. It was one of the first images our ancestors created on cave walls, when humans first started making art. It is one of the first things young children print on paper, when they are given paint for the first time. In many cultures a print of the hand, or a “Humse,” protects against evil. Hands are crucial for everything we do. My work is all HANDmade, and that is what makes it unique. We all have hands, and yet each person’s hands are very much their own. Hands make us the individuals that we are, yet, in their similarity, unite us into the wider web of humanity.

I decided to make an art quilt, yet break all the rules of quilting. Instead of the fine cotton fabrics usually used for quilting, I chose to incorporate the upholstery fabrics I fell in love with over the last few months.

For a long time I collected suitable pieces in my favorite colors and textures, until I had enough. Early this week I ironed double-sided interfacing to the back of the pieces, and meticulously outlined my left hand on nine different fabrics. I chose to use my actual hand and not a mold. This way each drawing turned out slightly different, yet they are all of the same thing. I cut them each out, getting a mirror-image that looks like, but is not, my right hand. I ironed them to their background, and then chose embroidery thread to go with each:


Next, I appliqued each and every one by hand. There is something very soothing about the repetitive motions of hand stitching. It is a wonderful stress-reliever for me, and this week turned out to be the perfect time to do this kind of work:


When all the pieces were appliqued, I played around with their arrangement:


I then settled on a pattern I liked, and machine-sewed all the pieces together, using a zigzag stitch:


When the entire top was finished, I “sandwiched” the piece together: top, batting and back, and set about to quilt them. Here I encountered an unexpected difficulty: the bulk of two layers of upholstery fabrics, combined with the batting and occasional seam, could not fit under my machine foot! I hadn't planned on hand-quilting this piece, but this is exactly what I had to do.

I hand quilted a few quilts before, but this one felt a lot different. Since each piece of fabric had a different texture, stitching through each felt very distinct. The more velvety segments were easier to sew through. Others were really resistant, and required the use of much force. It didn't take long before I had to frantically search for my various thimbles!


At one point my needle broke, something that never happened to me before! I had broken many a machine needles, but never a “real” one:


I chose to quilt this work with a color-changing thread that I thought might tie all the different hues together. Originally, I planned for an elaborate quilting pattern. After the first few stitches, however, I realized that neither the color of the thread nor the pattern mattered much: unlike with quilting cottons, the upholstery fabrics seemed to have “swallowed” the thread. It mostly disappeared within the textures, drowning into them. So I changed my plans, and quilted for practical reasons only: to attach all three layers together.   


The stitching itself also had to be adjusted. Due to the heaviness of the “sandwich” I had to go for much larger, far-between stitches than I would have attempted on a traditional quilt.

The result, however, turned out to be very close to what I originally had in mind.


The heavy fabrics give the work a significant body, and the different, delicious textures give it lusciousness that traditional quilts lack.


I like to think of this work as a gesture of peace: a welcoming wave of “hello” many times over. We desperately need such gestures at this time.